Configure Password Settings through the CLI
Configure Basic Password Settings
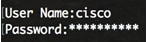
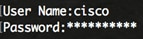
Step 1. Log in to the switch console. The default username and password is cisco.
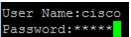
Note: The available commands or options may vary depending on the exact model of your device. In this example, the SG350X switch is used.
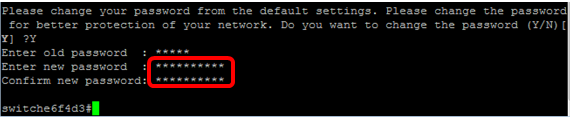
Step 2. You will be prompted to configure new password for better protection of your network. Press Y for Yes or N for No on your keyboard.

Note: In this example, Y is pressed.
Step 3. Enter the old password then press Enter on your keyboard.

Step 4. Enter and confirm the new password accordingly then press Enter on your keyboard.
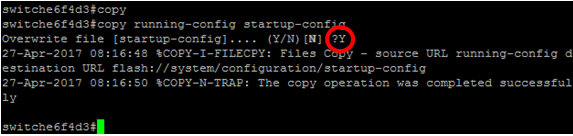
Step 5. Enter Privileged EXEC mode with the enable command. In the Privileged EXEC mode of the switch, save the configured settings to the startup configuration file, by entering the following:
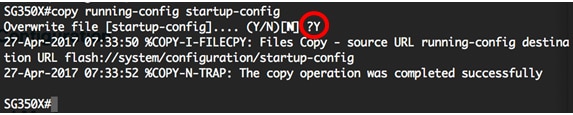
SG350X#copy running-config startup-config
Step 6. (Optional) Press Y for Yes or N for No on your keyboard once the Overwrite file [startup-config]… prompt appears.
You should now have configured the basic password settings on your switch through the CLI.
Configure Line Password Settings
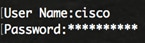
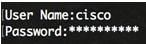
Step 1. Log in to the switch console. The default username and password is cisco. If you have configured a new username or password, enter those credentials instead.
Step 2. In the Privileged EXEC mode of the switch, enter the Global Configuration mode by entering the following:
SG350X#configure terminal
Step 3. To configure a password on a line such as console, Telnet, Secure Shell (SSH), and so on, enter the password Line Configuration mode by entering the following:
SG350X(config)#line [line-name]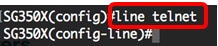
Note: In this example, the line used is Telnet.
Step 4. Enter the password command for the line by entering the following:
SG350X(config-line)#password [password][encrypted]
The options are:
- password — Specifies the password for the line. The length ranges from 0 to 159 characters.
- encrypted — (Optional) Specifies that the password is encrypted and copied from another device configuration.
Note: In this example, the password Cisco123$ is specified for the Telnet line.

Step 5. (Optional) To return the line password to the default password, enter the following:
SG350X(config-line)#no password
Step 6. Enter the end command to go back to the Privileged EXEC mode of the switch.
SG350X(config)#end
Step 7. (Optional) In the Privileged EXEC mode of the switch, save the configured settings to the startup configuration file, by entering the following:
SG350X#copy running-config startup-config
Step 8. (Optional) Press Y for Yes or N for No on your keyboard once the Overwrite file [startup-config]… prompt appears.

You should now have configured the line password settings on your switch through the CLI.
Configure Enable Password Settings
When you configure a new enable password, it is automatically encrypted and saved to the running configuration file. No matter how the password was entered, it will appear in the running configuration file with the keyword encrypted together with the encrypted password.
Follow these steps to configure the enable password settings on your switch through the CLI:
Step 1. Log in to the switch console. The default username and password is cisco. If you have configured a new username or password, enter those credentials instead.
Step 2. In the Privileged EXEC mode of the switch, enter the Global Configuration mode by entering the following:
SG350X#configure terminal
Step 3. To configure a local password on specific user access levels on your switch, enter the following:
SG350X(config)#enable password [level privilege-level] [unencrypted-password | encrypted encrypted-password]
The options are:
- level privilege-level — Specifies the level for which the password applies. The level ranges from 1 to 15. If not specified, the level is set to the default value of 15. The user levels are as follows:
– Read-Only CLI Access (1) — User cannot access the GUI, and can only access CLI commands that do not change the device configuration.
– Read/Limited Write CLI Access (7) — User cannot access the GUI, and can only access some CLI commands that change the device configuration. See the CLI Reference Guide for more information.
– Read/Write Management Access (15) — User can access the GUI, and can configure the device.
SG350X(config)#enable password level 7 Cisco123$
Note: In this example, the password Cisco123$ is set for the level 7 user account.
- unencrypted-password — The password for the username that you are currently using. The length ranges from 0 to 159 characters.
SG350X(config)#enable password level Cisco123$
Note: In this example, the password Cisco123$ is used.
- encrypted encrypted-password — Specifies that the password is encrypted. You can use this command to enter a password that is already encrypted from another configuration file of another device. This will allow you to configure the two switches with the same password.
SG350X(config)#enable password encrypted 6f43205030a2f3a1e243873007370fab
Note: In this example, the encrypted password used is 6f43205030a2f3a1e243873007370fab. This is the encrypted version of Cisco123$.

Note: In the above example, the enable password Cisco123$ is set for the level 7 access.
Step 4. (Optional) To return the user password to the default password, enter the following:
SG350X(config)#no enable password
Step 5. Enter the exit command to go back to the Privileged EXEC mode of the switch.
SG350X(config)#exit
Step 6. (Optional) In the Privileged EXEC mode of the switch, save the configured settings to the startup configuration file, by entering the following:
SG350X#copy running-config startup-config
Step 7. (Optional) Press Y for Yes or N for No on your keyboard once the Overwrite file [startup-config]… prompt appears.

You should now have configured the enable password settings on your switch through the CLI.
Configure Service Password Recovery Settings
The service password recovery mechanism provides you with physical access to the console port of the device with the following conditions:
- If password recovery is enabled, you can access the boot menu and trigger the password recovery in the boot menu. All configuration files and user files are kept.
- If password recovery is disabled, you can access the boot menu and trigger the password recovery in the boot menu. The configuration files and user files are removed.
- If a device is configured to protect its sensitive data with a user-defined passphrase for Secure Sensitive Data, then you cannot trigger the password recovery from the boot menu even if password recovery is enabled.
Service password recovery is enabled by default. Follow these steps to configure the service password recovery settings on your switch through the CLI:
Step 1. Log in to the switch console. The default username and password is cisco. If you have configured a new username or password, enter those credentials instead.
Step 2. In the Privileged EXEC mode of the switch, enter the Global Configuration mode by entering the following:
SG350X#configure terminal
Step 3. (Optional) To enable the password recovery setting on the switch, enter the following:
SG350X#service password-recovery
Step 4. (Optional) To disable the password recovery setting on the switch, enter the following:
SG350X#no service password-recovery
Step 5. (Optional) Press Y for Yes or N for No on your keyboard once prompt below appears.

Note: In this example, Y is pressed.
Step 6. Enter the exit command to go back to the Privileged EXEC mode of the switch.
SG350X(config)#exit
Step 7. (Optional) In the Privileged EXEC mode of the switch, save the configured settings to the startup configuration file, by entering the following:
SG350X#copy running-config startup-config
Step 8. (Optional) Press Y for Yes or N for No on your keyboard once the Overwrite file [startup-config]… prompt appears.
You should now have configured the password recovery settings on your switch through the CLI.
Configure Password Complexity Settings
The password complexity settings of the switch enable complexity rules for passwords. If this feature is enabled, new passwords must conform to the following default settings:
- Have a minimum length of eight characters.
- Contain characters from at least four character classes such as uppercase letters, lowercase letters, numbers, and special characters available on a standard keyboard.
- Are different from the current password.
- Contain no character that is repeated more than three times consecutively.
- Do not repeat or reverse the users name or any variant reached by changing the case of the characters.
- Do not repeat or reverse the manufacturers name or any variant reached by changing the case of the characters.
You can control the above attributes of password complexity with specific commands. If you have previously configured other complexity settings, then those settings are used.
This feature is enabled by default. Follow these steps to configure the password complexity settings on your switch through the CLI:
Step 1. Log in to the switch console. The default username and password is cisco. If you have configured a new username or password, enter those credentials instead.

Step 2. In the Privileged EXEC mode of the switch, enter the Global Configuration mode by entering the following:
SG350X#configure terminal
Step 3. (Optional) To enable the password complexity settings on the switch, enter the following:
SG350X(config)#passwords complexity enable
Step 4. (Optional) To disable the password complexity settings on the switch, enter the following:
SG350X(config)#no passwords complexity enable
Step 5. (Optional) To configure the minimum requirements for a password, enter the following:
SG350X(config)#passwords complexity [min-length number] [min-classes number] [not-current] [no-repeat number] [not-username] [not manufacturer-name]
The options are:
- min-length number — Sets the minimal length of the password. The range is from 0 to 64 characters. The default value is 8.
- min-classes number — Sets the minimal character classes such as uppercase letters, lowercase letters, numbers, and special characters available on a standard keyboard. The range is from 0 to 4 classes. The default value is 3.
- not-current — Specifies that the new password cannot be the same as the current password.
- no-repeat number — Specifies the maximum number of characters in the new password that can be repeated consecutively. Zero specifies that there is no limit on repeated characters. The range is from 0 to 16 characters. The default value is 3.
- not-username — Specifies that the password cannot repeat or reverse the user name or any variant reached by changing the case of the characters.
- not-manufacturer-name — Specifies that the password cannot repeat or reverse the name of the manufacturer or any variant reached by changing the case of the characters.
Note: These commands do not wipe out the other settings. Configuring the passwords complexity settings only work as a toggle.
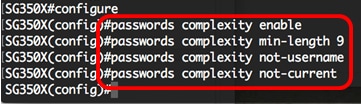
Note: In this example, the password complexity is set to at least 9 characters, cannot repeat or reverse the user name, and cannot be the same as the current password.
Step 6. Enter the exit command to go back to the Privileged EXEC mode of the switch.
SG350X(config)#exit
Step 7. (Optional) In the Privileged EXEC mode of the switch, save the configured settings to the startup configuration file, by entering the following:
SG350X#copy running-config startup-config
Step 8. (Optional) Press Y for Yes or N for No on your keyboard once the Overwrite file [startup-config]… prompt appears.

You should now have configured the password complexity settings on your switch through the CLI.
To show the password configuration settings on the CLI of your switch, skip to Show Passwords Configuration Settings.
Configure Password Aging Settings
Aging is relevant only to users of the local database with privilege level 15 and to configured enable passwords of privilege level 15. The default configuration is 180 days.
Follow these steps to configure the password complexity settings on your switch through the CLI:
Step 1. Log in to the switch console. The default username and password is cisco. If you have configured a new username or password, enter those credentials instead.
Step 2. In the Privileged EXEC mode of the switch, enter the Global Configuration mode by entering the following:
SG350X#configure terminal
Step 3. To specify the password aging setting on the switch, enter the following:
SG350X(config)#passwords aging [days]
- days — Specifies the number of days before a password change is forced. You can use 0 to disable aging. The range is from 0 to 365 days.
Note: In this example, the password aging is set to 60 days.

Step 4. (Optional) To disable password aging on the switch, enter the following:
SG350X(config)#no passwords aging 0
Step 5. (Optional) To return the password aging to the default setting, enter the following:
SG350X(config)#no passwords aging [days]
Step 6. Enter the exit command to go back to the Privileged EXEC mode of the switch.
SG350X(config)#exit
Step 7. (Optional) In the Privileged EXEC mode of the switch, save the configured settings to the startup configuration file, by entering the following:
SG350X#copy running-config startup-config
Step 8. (Optional) Press Y for Yes or N for No on your keyboard once the Overwrite file [startup-config]… prompt appears.

You should now have configured the password aging settings on your switch through the CLI.
To show the password configuration settings on the CLI of your switch, skip to Show Passwords Configuration Settings.
Show Passwords Configuration Settings
Aging is relevant only to users of the local database with privilege level 15 and to configured enable passwords of privilege level 15. The default configuration is 180 days.
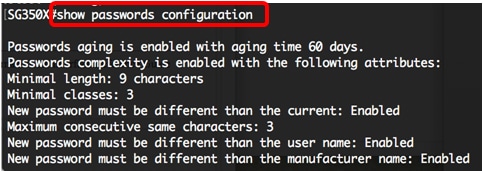
Step 1. In the Privileged EXEC mode of the switch, enter the following:
SG350X(config)#show passwords configuration